My business website has changed to www.learntoflypaloalto.com. Yes, it's long but what the heck. If you want to learn to fly airplanes, single or multi-engine or learn how to fly in clouds reference my new site.
I will likely keep this blog intact, but I may move future blogging to the website - TBD.
Have a great holiday break!
-Dave
Wednesday, December 15, 2010
Saturday, November 20, 2010
Great day flying the Cirrus Prospective with Henry
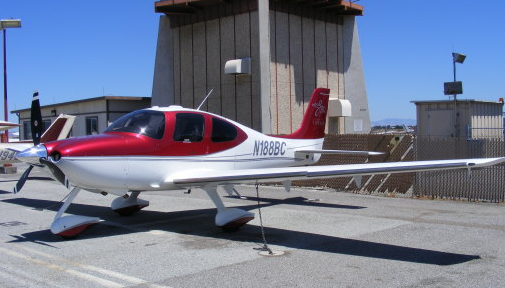
Some time ago, I asked my good friend Henry, a fine wood worker if he would make a projector cabinet for me and I would give him a ride in a "modern" aircraft. I chose the Cirrus Prospective whose avionics and cockpit comfort I love.
Henry used to work for Consolidated Aircraft post WWII.
We decided to fly from his nearby airport in the Sierra Nevada foothills of California to Castle-Merced (KMER) airport which has a mongo runway and an interesting air musuem. It used to be a military base at which any kind of aircraft could land. It was a treat walking around the museum with Henry telling me the history of much of the aircraft and pointing out ones that he helped design.
We had a severe clear day - at least 100 miles of visibility until we descended into the central California gorp which was about 2000' feet deep.
To say he was very impressed with the Cirrus Prospective is an understatement. I guess he had no idea how far avionics and creature comforts had come since he was involved in aviation many years ago.
VOR Navigation Basics for Aviators
VOR navigation isn't the most user friendly way of getting around, but once you understand a few basics and some recipes on how to use the darned system, it's really not that bad.
I am writing this blog post with the student pilot in mind, but hopefully the private pilot who never really understood VOR navigation will learn something too.
As with many aspects of aviation there are two ways to work with any system: the concept and the actual use. The concept is something you do during simulating or at home with pencil and paper. A very good and free simulator can be found here and I affectionately call it Tim's Airnav. Actual use of the system as I describe below means understand what you want to do, then follow the recipe for that item. If you are in the cockpit and working on the conceptual part, you are in the wrong place. You should be home at the kitchen table. The cockpit is a great place to make sure you can use the VORs, but not a place to understand how they work. The degree to which this is true is proportional to turbulence and how fast the weather is closing in.
There are three procedures you frequently encounter with VOR navigation:
- Intercept a radial and fly inbound (inbound means fly towards the VOR)
- Intercept a radial and fly outbound (outbound means to fly away from the VOR)
- Fly direct from your current position to a VOR
Before we proceed there are some concepts we must agree on or I will be writing into the cone of confusion or perhaps addressing the zone of ambiguity. :-)
A single VOR station is composed of a group of antennas on the ground that fire at different times, in a prescribed order, emit a group of radio signals during each cycle. Your cockpit VOR receiver receives these signals and enables you to determine on which of 360 radials your aircraft is located. A radial is an electronic "line of position" (navigator's acronym: LOP). A line of position is a line on the ground on which you are located. If it is a radial then you can state you are on a line that starts at a position on the earth (the VOR station) and tracks the surface of the earth on a magnetic direction which is the value of the radial. Radials are numbered 000 to 359. The 000 can also be referred to as the 360 degree radial. A technician turns a knob at the ground station and rotates all 360 radials so that the 000 (360) radial points at magnetic north for that particular spot on the earth. Remember that the angle of magnetic north from geographic north varies from place to place on the surface of the earth - that's why it's called "variation". Having radials reference magnetic points on the compass simplifies the life of the pilot because cockpit references to direction are made via magnetic references (usually a magnetic compass, magnetic flux detection, etc.).
Next concept, is the radial. Think of a VOR transmitter as a dot on the ground from which 360 lines emanate. These lines are called radials. Each line is numbered 000-359. Each line is a radial. Whoops, I repeat myself, but intentionally. A radial starts at a VOR transmission station and radiates FROM (note the emphasis on "from") the station. For example, the 090 radial (magnetic direction is expressed in 3 digits with a leading zero or leading zeroes) radiates from the VOR and creates an electronic ground track towards magnetic east. It doesn't matter if I jump on the 090-degree radial and I fly towards the VOR or I fly away from the VOR, I am still on the 090 radial - direction of flight is irrelevant. Let's fly towards the VOR on the 090. This means the aircraft is tracking magnetic west (track=270 deg. magnetic). One mile away from the VOR the aircraft is still on the 090 and still tracking 270 deg. magnetic. A moment later the airplane crosses the VOR. At the crossing all radials come together - it's big mess and it's called the "Cone of Confusion". However, if I ignore the drunken CDI on my omnibearing selector (OBS) display, it will eventually settle down as I keep heading west and if all goes well, I cross the VOR, leaving the 090-degree radial behind and now I am flying outbound on the 270-degree radial heading away from the VOR and into the sunset. Remember radials start at the VOR and radiate out from there. A specified radial does not cross the VOR station. In this case, we track inbound on the 090 radial, cross the station, and are then tracking the 270-degree radial.
Summary, all radials have a number and an origin at the VOR - they emanate "FROM" the ground-based VOR transmitter.
Now the part that messes up the beginner and a lot of experienced folks, the notion of the "TO" and the "FROM" flag on the OBS display. If you turn the OBS dial and you center the CDI with a "FROM" indication then the value you read at the top of the protractor is the radial on which your aircraft is positioned. If you center the CDI and a "TO" indication is shown in the TO/FROM window, then you are on the radial indicated on the bottom of the protractor. Confused? If so, don't feel alone. It's not so bad once you understand the reason for this and it revolves around the fact that humans aren't very good at flying with reverse sensing. Keep reading for more on this topic.
To illustrate the reverse sensing concept, suppose you desire to fly the 090-degree radial towards the VOR, cross the ground station and keep going into the sunset on the 270-degree radial. Suppose you have passed the VOR, you have 270 dialed on top of the OBS protractor scale, the CDI is perfectly centered and the OBS displays a "from" indication. This means you are on the 270 radial. Suppose the aircraft drifts southward. This would cause the CDI to drift to the right side of the display. It's telling you that the radial you have tuned in (270 deg.) is on your right and you aren't on it anymore. You need to turn the aircraft a few degrees right to re-intercept the 270 deg. radial. If the needle drifts to the left of the display while the aircraft parallels the 270 radial, you have drifted north and you must turn the aircraft to the left to re-intercept the 270 radial. If you are flying parallel to the desired radial and the needle is on the left, you need to turn left to intercept the radial. For a CDI on the right the radial is on your right and you must turn right to intercept. In both cases you turn into, or "towards" the needle to intercept the radial.
To illustrate the reverse sensing concept, suppose you desire to fly the 090-degree radial towards the VOR, cross the ground station and keep going into the sunset on the 270-degree radial. Suppose you have passed the VOR, you have 270 dialed on top of the OBS protractor scale, the CDI is perfectly centered and the OBS displays a "from" indication. This means you are on the 270 radial. Suppose the aircraft drifts southward. This would cause the CDI to drift to the right side of the display. It's telling you that the radial you have tuned in (270 deg.) is on your right and you aren't on it anymore. You need to turn the aircraft a few degrees right to re-intercept the 270 deg. radial. If the needle drifts to the left of the display while the aircraft parallels the 270 radial, you have drifted north and you must turn the aircraft to the left to re-intercept the 270 radial. If you are flying parallel to the desired radial and the needle is on the left, you need to turn left to intercept the radial. For a CDI on the right the radial is on your right and you must turn right to intercept. In both cases you turn into, or "towards" the needle to intercept the radial.
When flying outbound from a VOR station: dial in the radial you desire to track on the top of the OBS display, keep the needle in the center (you will have a "from" indication). If the needle moves left, turn left a little; if the needle goes right, turn right a little.
The conceptually troubling part for many pilots is that what happens when flying inbound towards the ground station, for example flying in on the 090 radial and you incorrectly dialed in 090 on the top of the protractor? If the needle is centered, you are on the 090 radial and the TO/FROM flag will indicate "FROM". Now let's suppose that your aircraft drifts north. Which way does the needle go? Where do you want it to go? You want it to go to the left of center to tell you to turn the AC left to re-intercept the 090 radial. Does it? Answer: NO! Why? Because when you have a radial value dialed in and you are on that radial, the system assumes that you are heading away from the ground-based station. In this case, you have dialed 090 and have a "from" indication. This introduces a very important concept: the VOR receiver in your aircraft knows nothing about the heading of your aircraft. It's is only telling you where you are in relation to a radial. If you are north of the 090 hanging by a skyhook with 090 dialed into the OBS and you spin the aircraft on its cable, the CDI will not change (right of center in this case) regardless of where the aircraft is pointing at any moment as you spin on the skyhook. If you are on the 090 radial it will be centered as your aircraft makes its 360 rotation on the skyhook. If you are to the south it's the same as north except the needle is to the left of center as you do your swivel trick.
The conceptually troubling part for many pilots is that what happens when flying inbound towards the ground station, for example flying in on the 090 radial and you incorrectly dialed in 090 on the top of the protractor? If the needle is centered, you are on the 090 radial and the TO/FROM flag will indicate "FROM". Now let's suppose that your aircraft drifts north. Which way does the needle go? Where do you want it to go? You want it to go to the left of center to tell you to turn the AC left to re-intercept the 090 radial. Does it? Answer: NO! Why? Because when you have a radial value dialed in and you are on that radial, the system assumes that you are heading away from the ground-based station. In this case, you have dialed 090 and have a "from" indication. This introduces a very important concept: the VOR receiver in your aircraft knows nothing about the heading of your aircraft. It's is only telling you where you are in relation to a radial. If you are north of the 090 hanging by a skyhook with 090 dialed into the OBS and you spin the aircraft on its cable, the CDI will not change (right of center in this case) regardless of where the aircraft is pointing at any moment as you spin on the skyhook. If you are on the 090 radial it will be centered as your aircraft makes its 360 rotation on the skyhook. If you are to the south it's the same as north except the needle is to the left of center as you do your swivel trick.
So, there is an implicit assumption that you are always going outbound on a given radial and that the CDI shows your deviation from the radial based on the assumed outbound direction of the aircraft. But we are going inbound to the ground station on the 090! If you put 090 on the top of the OBS display and intend to fly the 090 inbound you will have to be straight-jacketed when you land because the needle will always be going the wrong direction relative to your deviation away from the 090 radial: If the aircraft drifts north, on your westward heading the needle moves to the right side! If you turn right to intercept - ouch, you are flying away from the line! If you keep your current position, but magically move the aircraft 180 degrees so you are going away from the VOR, then the needle is telling you the correct direction to turn to re-intercept the 090 radial. The fact that it goes the wrong way when you go inbound on the 090 with 090 dialed in and a "FROM" indication is called reverse sensing. The manufacturers of the receiver system said we can help pilots with this problem (I made this up, but it works even if it's not true). If flying inbound on a radial, we can have them dial in the reciprocal (radial + 180) which is 270 degrees (090 + 180) and correct sensing will occur. So imagine what would happen without a TO/FROM flag: if the aircraft is on the 090 radial, the needle would center when either 090 or 270 is dialed into the selector, but one would give you reverse sensing! Solution: put a TO/FROM flag on the display to tell the pilot if the aircraft is on "real" radial (emanating FROM the VOR) or he has dialed in the the "virtual" radial, or the reciprocal (270 is the reciprocal of the 090 radial). Problem solved. So, if I am on the 090 radial and I am inbound to the VOR and I dial in 270, I see a "TO" indication, and the sensing of the CDI needle is now correct so that if I am north of the 090, the CDI is to the left and so on. You are still on the 090 radial as you go inbound, but now you have correct, not reverse sensing.
So much for the conceptual topics, let's jump to cockpit pragmatics. There are 3 recipes you need to know. To select which one of the 3 recipes you need to accomplish your task, you first need to define the task to be accomplished. For example, do you want to intercept a radial and go to the VOR station or do you want to intercept and fly away from the VOR station?
The following assumes you have tuned in and ID'ed the VOR by its Morse code. The following precludes the use of calculating reciprocal courses - cockpit math should be avoided at all costs:
Recipe 1. Intercept a specified radial and fly in towards the ground station, let's assume the 210 deg. radial:
- Dial in 210 on the bottom of the OBS protractor (a "TO" indication appears)
- Note direction of needle relative to center: Left or right of center?
- Decide on angle to intercept the radial (45 deg. intercepts are common)
- View the top center of the OBS and scan 45 degrees in the direction of the needle and note value
- Turn airplane to a heading of that value to fly a 45 degree intercept towards the desired radial
- As the need sweeps towards center turn to a heading equal to the value on top of OBS
- As you maintain this heading and a centered needle, you are flying towards the ground station on the 210 deg. radial
Recipe 2. Intercept a radial and fly away from the ground station, assume the 210 deg. radial:
- Dial in 210 on the top of the OBS protractor (a "FROM" indication appears)
- Note direction of needle: Left or right of center?
- Decide on angle to use to intercept (assume 45 deg. intercept again)
- Moving view from top center of OBS protractor 45 degrees in the direction of the needle and note value
- Turn airplane to a heading of that value to fly a 45 degree intercept towards the desired radial
- Wait for needle to sweep towards center, as it does, turn towards value on top of OBS
- As you maintain this heading and a centered needle, you are flying away from the ground station on the 210 deg. radial
Recipe 3. Fly direct to the ground station from your present position:
- Turn dial, look for a "TO" indication
- While maintaining a "TO" indication, center needle
- Read value from top of OBS protractor
- Turn aircraft to a heading equal to the value on top of the OBS protractor
- Make appropriate corrections to keep the CDI needle in the center
- You are on your way to the VOR
- When the TO/FROM flag and the CDI move erratically you are on the VOR
Memorize these 3 recipes, especially if you are a student pilot - works every time. Again, nothing conceptual here just recipes.
Beginner warning: if you have a strong wind blowing the aircraft away from the line as you do your intercept, it may take a long time to make the intercept. Too shallow of an intercept can lead to the same problem. Trying increasing the intercept angle, but avoid using more than a 60-degree intercept.
Beginner warning: if you have a strong wind blowing the aircraft away from the line as you do your intercept, it may take a long time to make the intercept. Too shallow of an intercept can lead to the same problem. Trying increasing the intercept angle, but avoid using more than a 60-degree intercept.
An example: You desire to intercept the 090 radial and go inbound. You are somewhere east of the ground station. You dial 090 on the bottom of the OBS (that puts 270 on top). If you are north of the 090 radial the CDI will be towards the left of the display. Look at the top, it says 270. Count 4 big lines (10 deg.) and a small line (5 deg.) towards the needle across the protractor arc which yields 225. Turn your airplane to 225 degrees magnetic to obtain a 45-degree intercept. The needle will swing towards the center as you approach the line. As it does, turn your aircraft towards 270 degrees magnetic and keep the needle in the center. You are on your way to the VOR, tracking the 090 radial.
Ask yourself what it is I want to do and then select one of the recipes.
- Intercept a radial and go inbound? Recipe 1: Dial in the radial at the bottom of the display, obtain an intercept value on the needle side of the display and turn to that direction to intercept then turn onto the radial using the direction at the top of the OBS. Keep the CDI in the center.
- Intercept a radial and go outbound? Recipe 2: Dial in the radial at the top of the display, obtain an intercept value on the needle side of the display and turn to that direction to intercept then turn onto the radial using the direction at the top of the OBS. Keep the needle in the center.
- Fly direct to the VOR from your current position: turn the dial to obtain a "to" indication then center needle. Turn aircraft to the heading shown at the top of the OBS and keep the CDI in the center.
You do have to have an idea roughly where you are located relative to the VOR for this to work. However, for practical purposes on a private check ride, you will not be asked to, say, intercept the 090 radial and go inbound if you are west of the ground station. There are other aspects of VOR use that can cause problems for the novice, notably the cone of confusion and the zone of ambiguity. Be aware of these, but on the typical private check you will most likely get the simple intercept, fly to/from or fly direct to a VOR. As you pass over a VOR, you must fall back on the magnetic compass to maintain a constant course as the CDI and TO/FROM flag flip around erratically. Once you get a strong "from" indication you can turn to the assigned radial or stay on the reciprocal, whatever is appropriate.
If you cross a VOR and are assigned a radial that is not the reciprocal of the inbound radial, you will usually overshoot the new radial as you pass through the cone of confusion. Once you get a strong "from" indication, execute the following: turn, time, twist in that order. Turn means turn the aircraft to the same magnetic direction of the radial, time means set/reset a timer if appropriate for your navigation, and twist means turning the OBS dial to the new radial. The CDI will not likely be centered because you overshot the VOR in order to get a strong "from" indication. If this happens use recipe 2 to intercept the desire radial.
Beginner warning: The CDI indicates an angular error. Adjacent radials are very close to each other when you are close to the VOR ground station. Use small intercepts when crossing a VOR and intercepting the new radial.
Wednesday, September 8, 2010
Aircraft Meteorological Data Reports
For the eyes of aviators only, others enter here at your own risk :-) ....AMDAR (Aircraft Meteorological Data Reports) is really neat. Some airlines participate in putting a small data gathering device on their aircraft. As the aircraft ascends/descends, a broadcast wind direction, gusts, temperature and more (http://amdar.noaa.gov/FAQ.html gives detail) is sent to a data gathering agency. One of the more important factors transmitted is moisture content. Currently, around 140,000 samples are collected/day. This means wx folks and aviators have access to almost real time radiosonde-like sounding data. One example using this data can be found at http://rucsoundings.noaa.gov/. "RUC" stands for rapid update cycle. If you are not familiar with the display format, take the Texas A & M tutorial (link on bottom of rucsoundings page). The format is a log-p skew-t graph, something that weather experts have been using for years. However, the Java version of this graph allows you to get dew points, temperatures, wind velocity and direction, etc. in the atmosphere over the airport you selected and up to about FL400. You can also lift a hypothetical air parcel to see if it is stable or results in bad things. It's easy to find freezing levels, saturation altitudes (where clouds are liable to form, etc.). Nice stuff for aviators. Even if you only use it in a basic way.
Friday, April 23, 2010
Audio in the Cockpit
I have aways had trouble with recognizing expired timers in the cockpit. Timed approaches, arghhhhh.
I have often wondered why we don't see more integration with timers and audio in the cockpit. Just think about that ILS and the audio (male or female) saying your timer has just expired.
Or how about "time to switch tanks honey" (voice is opposite sex, of course!). Just think about how many tank switches you have screwed up as a pilot (I cannot count). It's not easy to remember to look at the clock which is often located out of the main viewing area of the pilot. Even a yoke mounted kitchen timer doesn't work in a noisy cockpit unless it has a light and it is night time. There has to be a better way!
Modern FMSs have a timer feature, but even then, an expiration message shows up as a visual somewhere you are guaranteed to not be looking when it occurs.
Yes, there are some technical issues like how to handle a coinciding call from ATC, but I am sure that there are solutions. Audio stream mixing at this point would be good. Perhaps one timer's audio can be "critical" and used in situations like timed approaches. Critical time expiration messages would be mixed with ATC voice, perhaps a few "TIMER! TIMER!" shouts or something like that. All other expiration messages can perhaps be deferred until after ATC finishes their voice transmission. A tank switch would be in this category. In other words, non-critical times are deferred in the event of a collision with incoming ATC messages and a critical time expiration message is mixed with the ATC input.
It's about time we quit missing time expiration messages and audio seems like the best way to solve this problem.
Subscribe to:
Posts (Atom)